Step 1: Make a plan
Make a plan of the fence you want to install. This will help you understand how the current finds its way through the fence. In this, we advise you to place the energiser as centrally as possible. We also advise you to create different zones with the deployment of switches.
Step 2: Determine the wire height
Step 3: Installing corner posts
Step 1 Determine the correct length of the corner posts according to the height of the fence.
For fencing up to 1 m construction height, a corner post of 2.00 m length is sufficient.
For fences up to 1.50 m in height, Gallagher recommends a corner post at least 2.50 m in length.
For fencing higher than 1.50m, Gallagher recommends corner posts between 3.00m and 3.50m in length.
Step 2 Drill a hole with an auger.
Step 3 Ensure that the corner post is placed at a 5-degree angle to the pulling direction. Depending on the distance between the corner posts, we recommend installing a ground beam. Use this when the distance between the corner posts exceeds 100m.
Step 4 Install corner insulators if necessary, install the corner insulators (insultimber posts do not need insulators).
Step 4: Intermediate posts
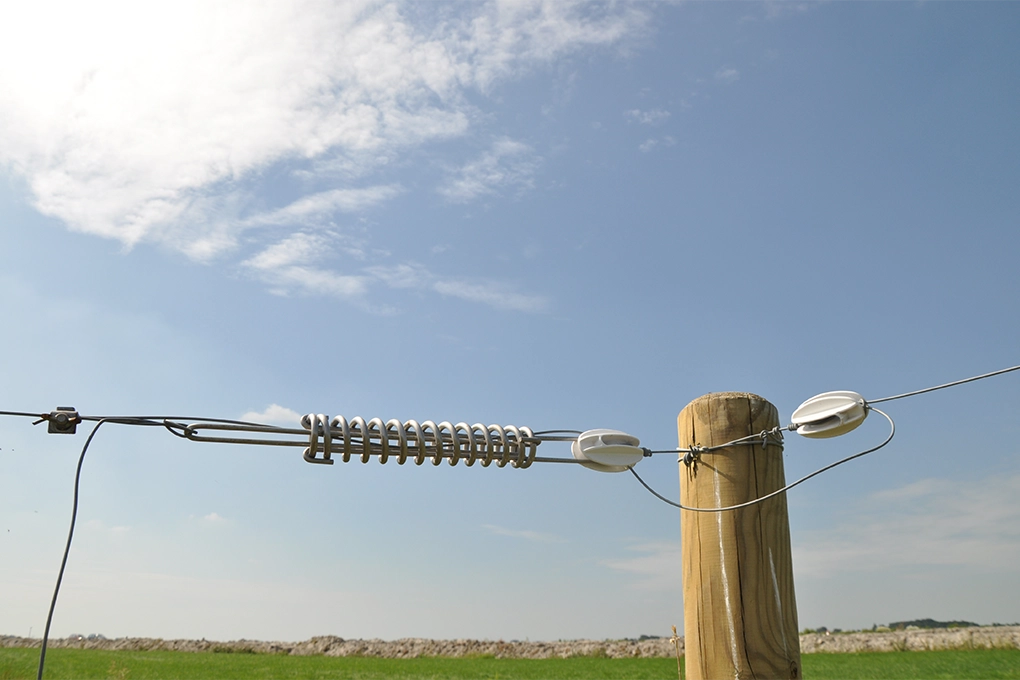
Step 5: Tension the electric fence
In our webshop you find all our tensioners.
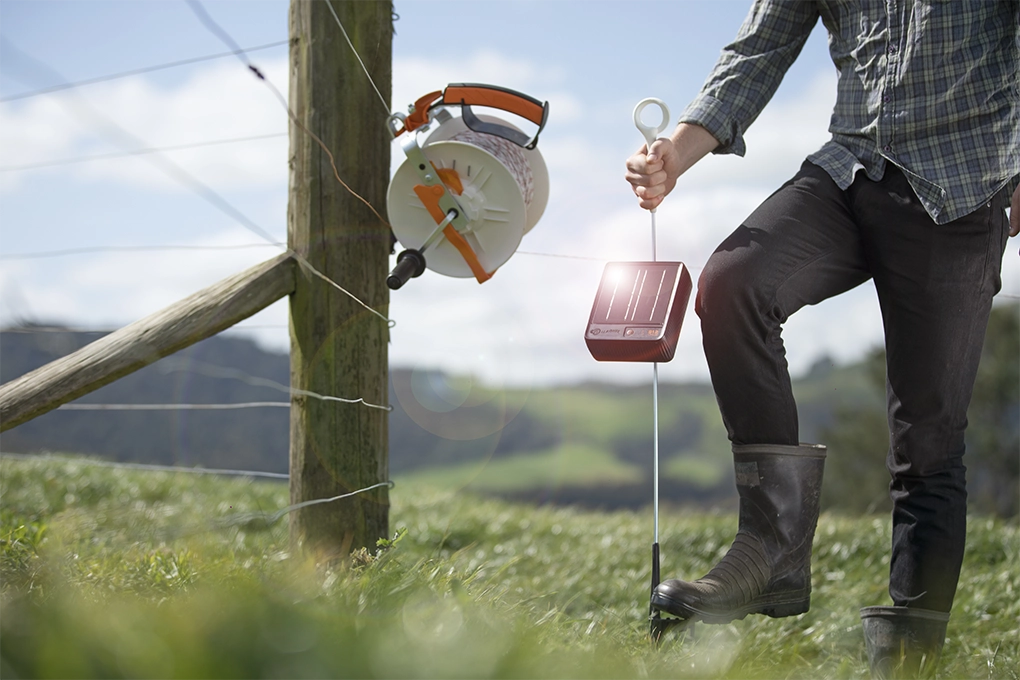
Step 6: Mount the device and ground it
Step 1: Mount the device according to the manual of the energiser. Our advice is to position the device as centrally as possible in relation to the fence.
Step 2: Then install the earthing with earth pins of 1 m or 1.7 m depending on the energiser. Gallagher advises you to follow the advice. Good earthing is crucial for a properly functioning electric fence.
Step 3: Drill a hole with the auger and insert the 1 m or 1.7 m earth stake. If more earth stakes are needed then place the next earth stake 3 m away from the first, and so on. The earth stake should have an earth clamp on it.
Step 4: You now make a connection between the energiser and the first earth stake with double-insulated earth cable. Attach the double-insulated cable to the earth stake and attach the cable to the green button of the device. Depending on the distance and the device, you will need 1.6 mm or 2.5 mm double-insulated cable.
Step 5: Make sure the earth pin including the cable is at least 10 cm below ground level. Do you have several earth pins? Then connect the first to the second earth stake with double-insulated ground cable and the second to the third, etc.
Step 6: If the soil in which the earth stake is placed is sandy or very dry, it is wise to add the special Bentonite grounding mix in the hole. Fill the hole up to the earth clamp.
Step 7: Fill the last part of the hole with the remaining soil and water it until the soil is even again.
Step 8: Repeat for each earth stake required. How many earth stakes you need depends on the type of device.